You can buy most of these things at a dollar store. Hehehehe. ;D
The Shield
Materials
- 3 posterboard
- Acrylic Paint (2 blue, red, 2 silver/gray, yellow)
- Mod Podge (matte and gloss, but just having one and not the other should be fine too)
- X-Acto cutter
- Cardboard (or a self-healing mat)
- Sandpaper
- Craft glue (or any type of white glue)
- Superglue
- Fasteners
- One sheet of card stock
- Old newspaper
- Paintbrushes, something to put paint on (like a paper plate)
1) Make a pattern for your shield on newspaper (make sure it can fit on the posterboard!). You can either tape two sheets of newspaper together OR you can just make half of the pattern on one sheet of newspaper (if you do this, you just have to trace everything carefully.
2) Trace the pattern onto all of the sheets of posterboard.
3) Cut TWO of these posterboard out. (To avoid anger from family, landlords, etc; make sure that you have cardboard, a magazine, or some self-healing mat to make sure the X-Acto knife doesn't cut whatever is underneath.)
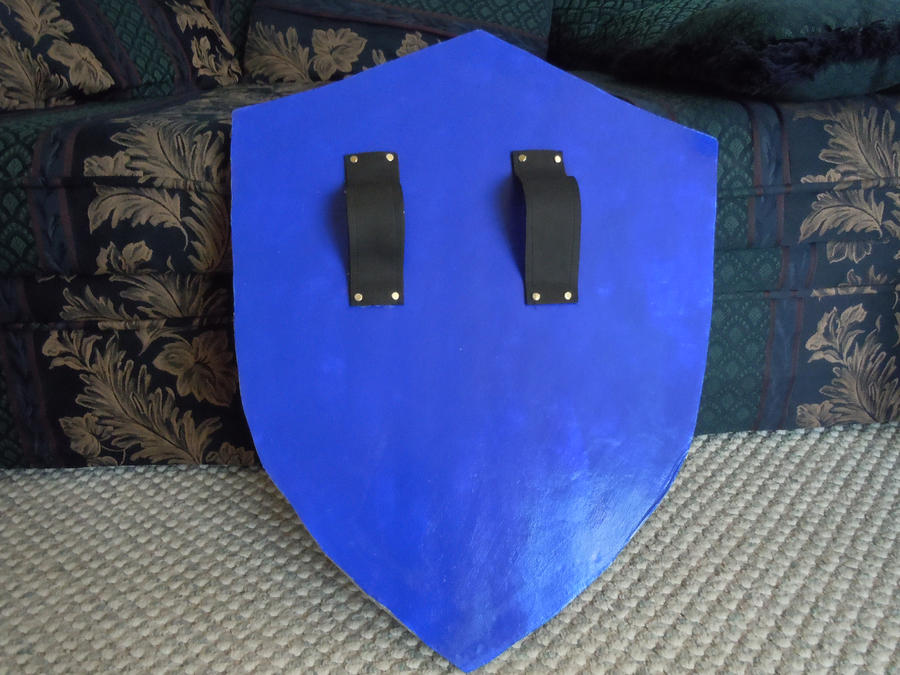
3) Now, carefully peel the paper off of the cut out shield parts (it's possible). You just need to be careful and it should come off easily (I didn't know I could do this the first time, so I had a horrible time sanding the edges. You should do this). This lets you just have the foamboard. Glue the two shield pieces together and you should have something similar to the picture.

4) On the uncut piece of cardboard, draw the pattern for the outer part of the shield. If you don't understand, look at the picture below. You'll notice that the outside is raised more than the rest of the shield. The design for OoT and Twilight Princess shields are different, so make sure you know which one you want! (For those of you who are very OCD about symmetry, math and numbers are your best friend. Measure everything out.)


5) Once you've drawn the pattern on the shield, cut everything out and you should have an outer piece that will go on your shield and an inner part. Don't throw the inner part away. Take the outer part of the shield and roughly trace the inner part onto the shield you've already cut out. (This will tell you where to paint. Your shield should essentially look like the picture above except cut out.) Sand the edges of the shield so they are even.
 |
| Put it like this then trace the inner part. |
6) Once you have traced the inside of the shield, it is time to paint the part of the shield you made in step 3. Prep the foam with two or three layers of mod podge (or gesso if you prefer), allowing it to dry between each layer. Once it has dried, you can paint on top of it with blue paint. You may need a few coats. Once it is dry, add one or two coats of Mod Podge to finish.
7) Repeat step 6 with the outer part of the shield, painting the top and inner sides only. Below are the two separate pieces.
 |
| You bet I worked on the kitchen floor. Hahaha. |
9) Now, this is where you need to be EXTRA careful. Once your fasteners have dried, you need to push them into the top portion of the shield. Fold the ends of the fasteners over to keep them there.
10) Once that is done, you can finally glue the top portion to the bottom portion of the shield. I used super glue here to make sure that the ends stayed down.
11) Now for the inner portion of the shield. Make 4 triangles and the upper portions of the shield in leftover foam board (I would recommend you DON'T use the inner portion of the shield for this step.) Prep and paint them like the other pieces.
12) I use the inner portion of the shield to help design the bird design of the shield. Draw (or print, if you can find a good image) the bird onto the cardstock and cut it out using the X-Acto knife.
 |
| The actual shield was drying at the time, so I used this instead. |
 |
| Now this is what you should have! |
15) Finally, paint the edge of the shield silver and the back of the shield blue, remembering to start and finish with Mod Podge. Then VOILA! You've got almost everything done!
 |
| Yayyy! |
Backstraps
Now most of you will think, "Uhh, how will I carry this thing around?" Great question! My solution will not be okay for LARP or even con-going. It's extremely delicate, but it worked fine for what I needed it for: a photoshoot.
Materials
- Black craft foam
- Fasteners
- Sewing machine
- Black thread
2) On two of the straps, sew a straight stitch near the long edges of the craft foam.
3) Glue one sewn strap to one un-sewn strap.
4) Pierce the glued straps with four fasteners (one near each corner).
5) Hot glue/super glue the straps to the back of the shield.
The Sword
I didn't really take pictures as I was making it because this was more freehand than my shield. I will try to explain it to the best of my ability.
I didn't really take pictures as I was making it because this was more freehand than my shield. I will try to explain it to the best of my ability.
Additional Materials
- 1 poster board
- Paper towel roll
- Masking tape
- Acrylic Paint (a lighter gray and a darker gray)
2) Make a sword pattern to use on your poster board. (Below is not to size)

3) Cut out the shapes of your pattern. I forgot to add it, but you'll need TWO sword shapes and not one. Remove the paper parts from all the pieces.
4) For the circles, glue them all together. They should all be the same size. You will be sanding them so they are rounded.This is your hilt. Paint the hilt blue (prep and finish the hilt with Mod Podge!!).

5) Glue the two sword pieces together and carefully shave the edges of the sword off with an X-Acto knife. It will give the sword more depth. Sand it to help even out edges.
6) Paint the sword the same color as the shield. However, for the shaved edges, put a lighter shade of gray on top. It'll help cover any imperfections with the cutting you may have done.
7)Add depth to the triangular part of the sword by shaving off the edges like you did with the sword. Paint same yellow as the triangles.
8) For the wings of the sword, you can press into the foam using a covered marker. Since foam is so soft, the imprint will stay. Paint these as well, as if you want to emphasize the indents, add a little bit of black to the blue and paint the indents.
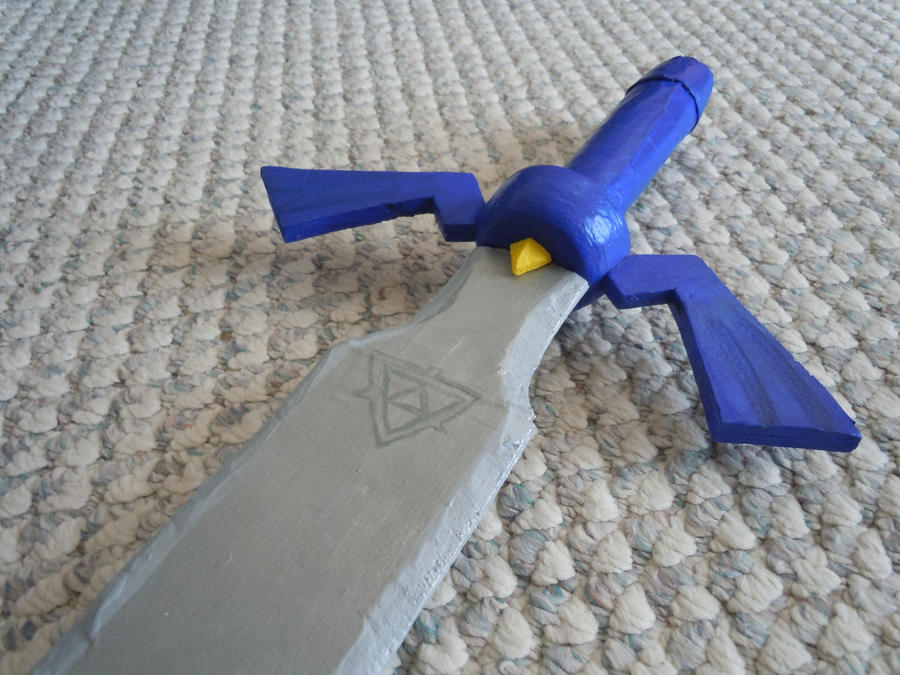 |
| If you look closely here, you can see where I glued the sword together. |
9) Finally, take out your paper towel roll. This will be the handle of your sword. Cut down the middle of the tube so you can make the handle thinner. Size it appropriately and then cut where you need to (to make it shorter).
10) Take the remaining paper towel roll you have and cut a smaller portion off for the end of the sword. One end should be larger than the other (look at the image above to see what I mean) and it should fit snugly against the end of your handle. Tape it so it stays that size. Also add tape to the open end.
11) Now take your masking tape and roll it around the handle of your sword so it looks like you've wrapped it. Once you're happy with your product, paint the handle blue and finish with Mod Podge. Do the same with the end of the sword.
12) Now use some glue to help the end of the sword stick to the handle.
13) You'll need to trace the shape of your handle to the bottom of your hilt. Cut into your hilt so that the handle fits in snugly WITHOUT cutting all the way through the hilt.
14) Now you have to take the thinner part of your sword (the end opposite of the "blade") and trace the bottom of the thin part of the sword onto the hilt where you want your sword to fit in. Cut that out and you should have cut through your entire hilt.
15) Push your sword through the hilt and put glue around the parts where the sword comes out through the hilt. This should help it stay.
16) Now put glue on the inner edges of the hilt and put the handle into it. Pray to the gods of cosplay.
17) Finally, glue your little yellow triangle on the hilt and you're done!
Phew.
That took forever.
Next --> The Potion Necklace
No comments:
Post a Comment